目的
Fortigate60Cを動作モード「Transparent」に設定して、Fortigateを通過するパケットを透過できるかを確認する
構成

interfaceステータス
初期はNATモードのため、IPがdmzポートとinternalポートに振られている。
上位モデルにはMGTポートが192.168.1.99の管理IPを持っているが、このモデルにはinternalポートに振られている
初期は全てのポートが”root”VDOMに属している
# show system interface
config system interface
    edit "dmz"
        set vdom "root"
        set ip 10.10.10.1 255.255.255.0
        set allowaccess ping https http fgfm capwap
        set type physical
        set snmp-index 1
    next
    edit "wan2"
        set vdom "root"
        set mode dhcp
        set allowaccess ping fgfm auto-ipsec
        set type physical
        set snmp-index 2
    next
    edit "wan1"
        set vdom "root"
        set mode dhcp
        set allowaccess ping fgfm auto-ipsec
        set type physical
        set snmp-index 3
    next
    edit "modem"
        set vdom "root"
        set mode pppoe
        set type physical
        set snmp-index 4
    next
    edit "ssl.root"
        set vdom "root"
        set type tunnel
        set alias "SSL VPN interface"
        set snmp-index 7
    next
    edit "internal"
        set vdom "root"
        set ip 192.168.1.99 255.255.255.0
        set allowaccess ping https ssh http fgfm capwap
        set type physical
        set snmp-index 8
    next
end
GUI接続用のIP設定
MGMTポートが無いため、internalポート(Port1~Port5)の192.168.1.99/24に作業端末NICのセグメントを合わせる(192.168.1.8に設定)。UTPケーブルで接続し、ブラウザでhttps://192.168.1.99に接続できること
ログインIDは、admin/空白
Transparentモード設定
デフォでNATモードなので、Transparentモードに変更する
# show full-configuration system settings | grep nat
    set opmode nat
    set sip-nat-trace enable

#  config system settings
    set admin-https-redirect disable
    set opmode transparent
    set manageip 192.168.1.99 255.255.255.0
    set gateway 192.168.1.254
  end

# show full-configuration system settings | grep opmode
    set opmode transparent
疎通確認
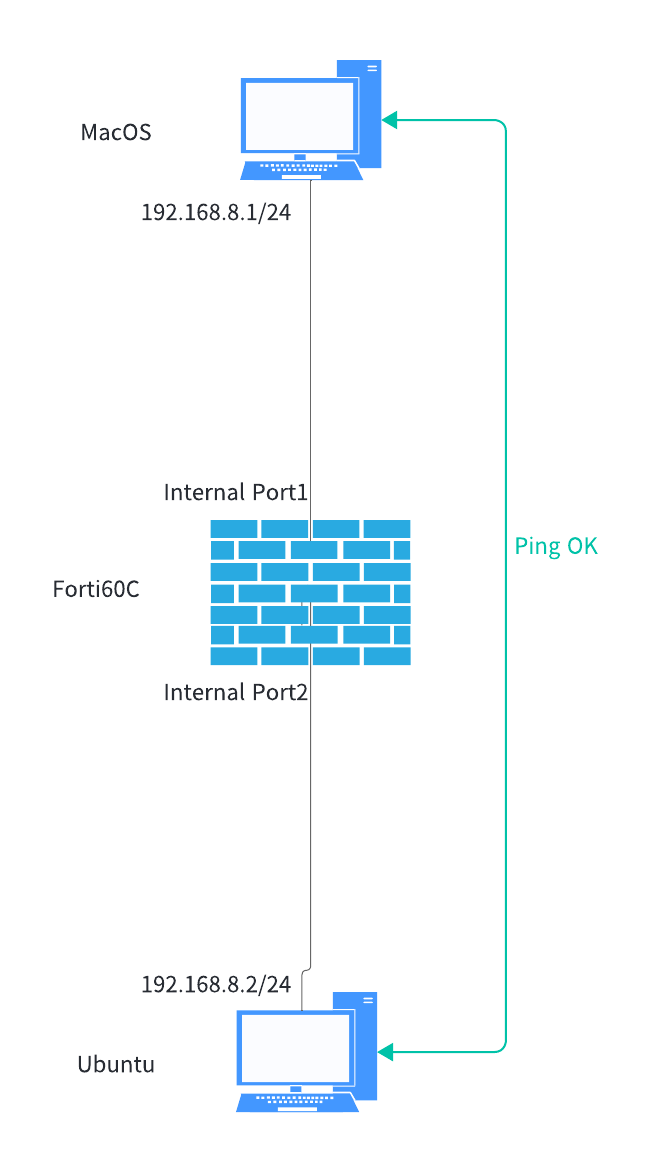
図の構成にするため、インラインの2ポートにUTMを挟んだ2つの端末を接続して疎通確認に問題ないこと。
ちなみにL2モードなので、本来の管理IP192.168.1.99は、HTTPSアクセスが許可されたdmzポートとInternalポートにVLAN IPのように振られている。そこに接続すればGUIアクセス可能


